Loft Conversion Roof: Re-Roof Now or Pay Twice Later
By the Professional Roofers team
Updated 2026 · Independent cost guide
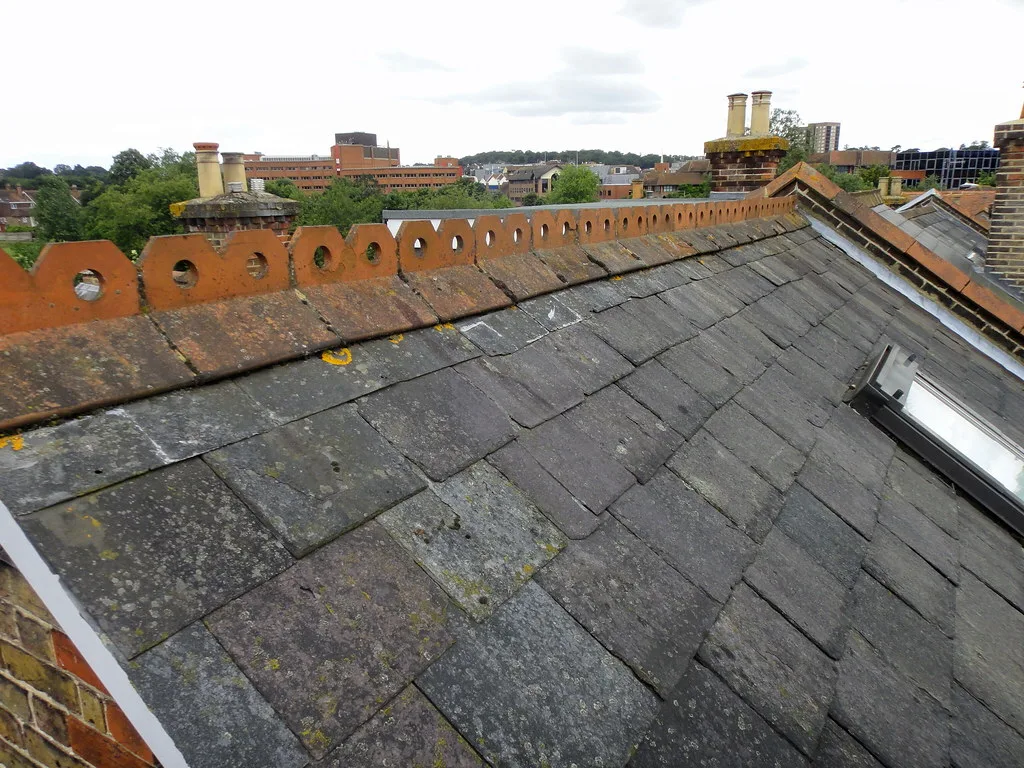
The loft conversion roof question that costs people the most money is not which tiles to use. It is whether to re-roof at the same time as the conversion, and it usually gets asked eighteen months too late, after the plasterboard is up and the scaffold has gone.
A loft conversion already involves stripping part of the roof, erecting a full scaffold, opening the structure and reinsulating at rafter level. Every one of those is also a line on a re-roofing quote. Doing them once costs far less than doing them twice, and doing them twice means opening up a room you have just decorated.
This is the sequence of decisions, in the order a roofer would want you to make them.
First: how much life is left in the covering?
The honest test is not the tiles, it is everything underneath and around them.
Most concrete tile roofs last several decades, and slate can go much longer, but the felt underlay, the battens, the mortar bedding on the ridge and the leadwork all age faster than the covering. A roof with sound tiles and a perished 1970s bitumen felt underlay is a roof that will need stripping within a few years, whatever the tiles look like from the pavement. Our guide to how long a roof lasts breaks the components down individually.
Three things to look for before the conversion is designed:
- Underlay condition. From inside the loft, before insulation goes in, look at the felt between the rafters. If it is brittle, torn at the eaves, or sagging in tatters, it is finished. This is the single best indicator, and after the conversion you will never see it again.
- Batten condition. Soft, split or under-sized battens mean the whole covering has to come off eventually.
- Nail sickness on slate. If slates are slipping in ones and twos across the whole roof rather than in one patch, the fixings have corroded and patch repair is a treadmill.
If any of those are true, re-roof with the conversion. If the roof was stripped and relaid recently and the underlay is a modern breathable membrane, the case is much weaker, and you can reasonably do only the areas the conversion disturbs.
Why doing both at once is cheaper than it looks
The savings are not sentimental, they are specific line items.
Scaffold. A loft conversion needs a full perimeter scaffold with an edge-protected working platform, which is one of the larger single costs in either job. Share it and you pay for it once. See roof scaffolding costs for what that item actually represents.
Strip and set-down. The conversion strips the roof over the new dormer or rooflight openings anyway, along with the associated leadwork, ridge and verge work. Extending that to the whole roof is incremental labour, not a fresh mobilisation.
Skip and waste. One waste run, not two.
Making good. New tiles next to forty-year-old tiles never match, however carefully they are sourced. Doing the whole roof avoids the patchwork appearance that a dormer inserted into an old covering produces, and avoids the awkward moment three years later when you re-roof and have to strip your own nearly new tiles around the dormer.
Access to the structure. With the covering off, the rafters, purlins and wall plates are visible and reachable. Any strengthening the conversion needs is far easier and cheaper to do from above than from inside a half-finished room.
Set against that, the case for waiting is cash flow and nothing else. That is a legitimate reason. Just cost it honestly, against new roof costs now versus the same job plus a second scaffold later.
The insulation rules a conversion triggers
This is the part that surprises homeowners, and it is where re-roofing and converting become genuinely intertwined.
A loft conversion turns unheated roof space into a habitable room, so the roof stops being a loft floor to insulate and becomes a wall and ceiling that must perform. LABC states the required U-value is 0.15 W/m²K in England, achieved with insulation between and usually also under the rafters to control thermal bridging. The regulations do not dictate the material, only the performance, and building control signs off the specific build-up for your job.
Two consequences follow directly.
Standard rafters are rarely deep enough. A typical older rafter is around 100mm deep. Filling it entirely with mineral wool will not reach the target, and in a cold roof build-up you also have to leave a ventilation gap above the insulation, which eats depth you do not have. The usual answers are rigid PIR board between rafters plus an insulated plasterboard layer beneath, or deepening the rafters with battens, both of which take headroom off the finished room.
A warm roof build-up needs the covering off. Putting the insulation above the rafters, which is thermally the cleanest solution and preserves internal headroom, means working from outside. That is only economic if you are re-roofing anyway. If you are, this is the moment to consider it, and it is the strongest technical argument for combining the jobs.
Whichever route you take, ventilation is not optional. A warm, moist room directly under a cold roof surface produces condensation, and condensation in a newly insulated roof rots the timbers you have just built a bedroom against. Our roof ventilation guide and loft roof insulation guide cover the detailing.
Headroom decides more than you expect
Nobody regrets a loft conversion for the tiles. They regret it for the ceiling height.
Every layer you add under the rafters comes off the finished head height, and there is no way around the arithmetic. Insulation depth, service void, plasterboard and skim can easily total 150 to 200mm off the underside of each rafter. Measure the existing rafter underside to joist top before design, and subtract honestly.
This is why the insulation strategy is a design decision rather than a detail. Insulating above the rafters, when the covering is off, keeps that depth inside the room. Insulating below it moves the ceiling down. On a marginal roof, that difference decides whether the conversion works at all.
Planning: what the roof itself is allowed to do
Many loft conversions are permitted development, but the conditions are specific and several of them are about the roof.
The Planning Portal sets the volume allowance at 40 cubic metres for terraced houses and 50 cubic metres for other houses, including any previous roof space additions, so a house that already has a rear dormer may have spent the allowance.
The roof conditions that catch people out:
- Nothing above the existing ridge height. A conversion cannot raise the roof.
- Nothing beyond the roof plane on the principal elevation. In practice, front dormers need planning permission.
- The enlargement must be set back at least 20cm from the original eaves, so far as practicable, and must not overhang the outer wall face. This shapes the dormer detailing directly and it is where inexperienced designs fail.
- Side-facing windows must be obscure-glazed, and openable only above 1.7m from the floor.
- Materials similar in appearance to the existing house. Another reason a whole-roof re-cover is cleaner than a mismatched patch.
- No verandas, balconies or raised platforms, and no altering or adding chimneys, flues or soil vent pipes under permitted development.
Conservation areas, national parks, AONBs and listed buildings sit outside all of this, and flats have no permitted development rights at all. Our planning permission and building regs page covers the roofing side in more detail.
Building regulations approval is required regardless of whether planning permission is. Permitted development is a planning concept, not a building control one, and the two are separate applications.
Dormer or rooflights?
The roof implications differ sharply.
Rooflights keep the roof plane intact, are usually the cheapest option, and on a rear roof slope are normally permitted development if they do not project more than 150mm and sit below the ridge. They add light but no floor area and no standing height. Installation is a roofing job with a well-established detail; see roof window installation costs.
A dormer creates usable head height and floor area, and it is a structural and weatherproofing intervention: new trimming to the rafters, a flat or pitched dormer roof, cheeks, and a lot of flashing. It is also where most loft conversion leaks originate, because it introduces junctions that a plain roof slope does not have. The flat roof on top is a roof in its own right with its own service life, so the covering choice matters; dormer roof costs covers the options.
If you are re-roofing at the same time, build the dormer first and re-cover around it. Doing it the other way round means cutting into new work.
Sequencing, and the three things that go wrong
The order that works: structural design and building regs first, then scaffold, then strip and any structural strengthening, then dormer or rooflight openings formed, then insulation and re-cover, then internal fit-out. The roof is watertight before anything internal starts.
What goes wrong:
Two contractors, one roof. A loft conversion firm and a roofer both working on the same covering, each assuming the other owns the underlay and flashing details. Put one party in charge of weathertightness in writing, or the leak becomes an argument rather than a repair.
The party wall notice forgotten. In a terrace or semi, cutting into a party wall for beams, or building a dormer up to it, is notifiable work under the Party Wall etc. Act 1996, with a statutory notice period. It is not optional and it delays projects that ignore it.
The scaffold struck too early. Once it is down, going back up for a missed flashing or an unresolved verge costs a re-hire. Walk the roof with the roofer before the scaffold is released, and check the ridge, the verges, the dormer cheeks and every flashing junction while access is still there.
Frequently asked questions
Do I need to replace the roof for a loft conversion? Not necessarily. A conversion only requires the roof to be opened where dormers or rooflights go, and to be insulated to standard at rafter level. But if the underlay, battens or fixings are near the end of their life, doing the whole roof while the scaffold is up is substantially cheaper than repeating the job later.
Does a loft conversion need building regulations approval? Always, whether or not you also need planning permission. They are separate consents. Building control covers structure, fire safety, stairs, insulation and ventilation, and signs off the specific insulation build-up for your roof.
What U-value does a loft conversion roof need? LABC states 0.15 W/m²K in England, typically achieved with insulation between the rafters plus a layer beneath to reduce thermal bridging. The regulations set the performance, not the material, and building control confirms the build-up for your job.
Can I put a dormer on the front of my house without planning permission? Generally no. Permitted development does not allow an enlargement beyond the plane of the roof slope on the elevation fronting a highway, so a front dormer normally needs a planning application. Rear dormers are more often permitted development, within the 40 or 50 cubic metre volume allowance.
Is a warm roof or cold roof better for a loft conversion? A warm roof, with insulation above the rafters, performs better and preserves internal head height, but it requires the covering to be stripped, so it only makes economic sense if you are re-roofing anyway. A cold roof insulates between and below the rafters, needs a ventilation gap above the insulation, and lowers the finished ceiling.
How much headroom will the insulation take? Insulation, service void, plasterboard and skim commonly total 150 to 200mm below the rafters. On a roof that is marginal for head height, that alone can decide whether the conversion is viable, which is why the insulation strategy belongs in the design stage rather than on site.
Want costs like this each month?
Join the Roofline brief for current UK prices and quote-reading tips.
More from Professional Roofers
How Much Does a New Roof Cost in the UK in 2026?
What a new roof really costs in the UK in 2026, broken down by house size, material and the hidden extras, plus how to check you are being quoted fairly.
Chimney Repointing and Repair Cost UK (2026)
What chimney repointing cost is in the UK in 2026, why scaffolding drives the price, and how repointing compares to rebuilding, flashing and pot repairs.
Roof Inspection and Survey Cost UK: What's Checked and the Price
Roof inspection cost UK 2026: what a ground, ladder or drone survey checks, typical prices for each, and when a written roof report is worth paying for.